
How It Works
From setup to production output in a practical shop workflow.
Follow the complete CabinetCut PRO workflow from account setup through libraries, jobs, cabinets, purchasing summaries, cut lists, labels, and backups.
Step 1 — Create Your Account
Create your account and sign in to CabinetCut PRO.
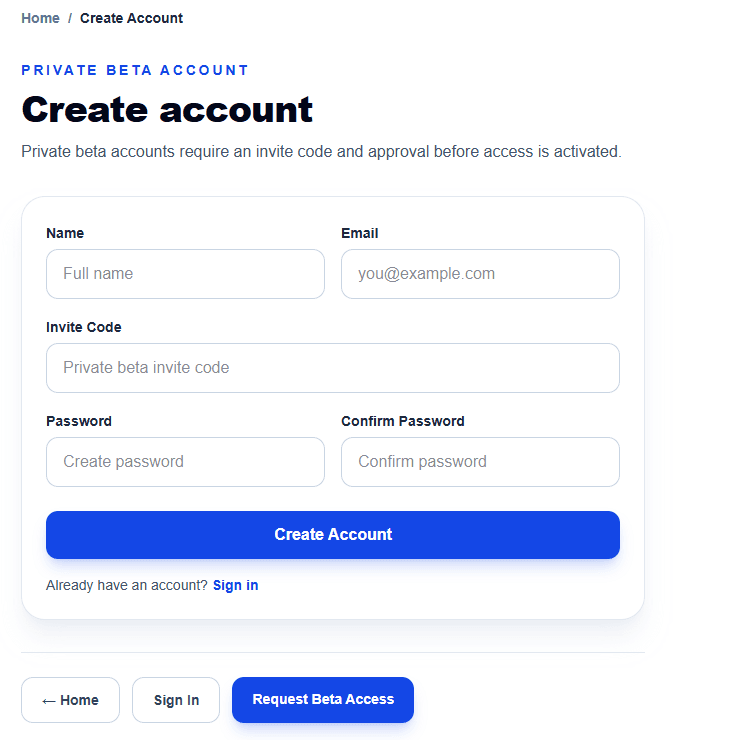
Example: Create Your Account Screen
Step 2 — Configure Your Shop
Configure settings, materials, suppliers and shop defaults.
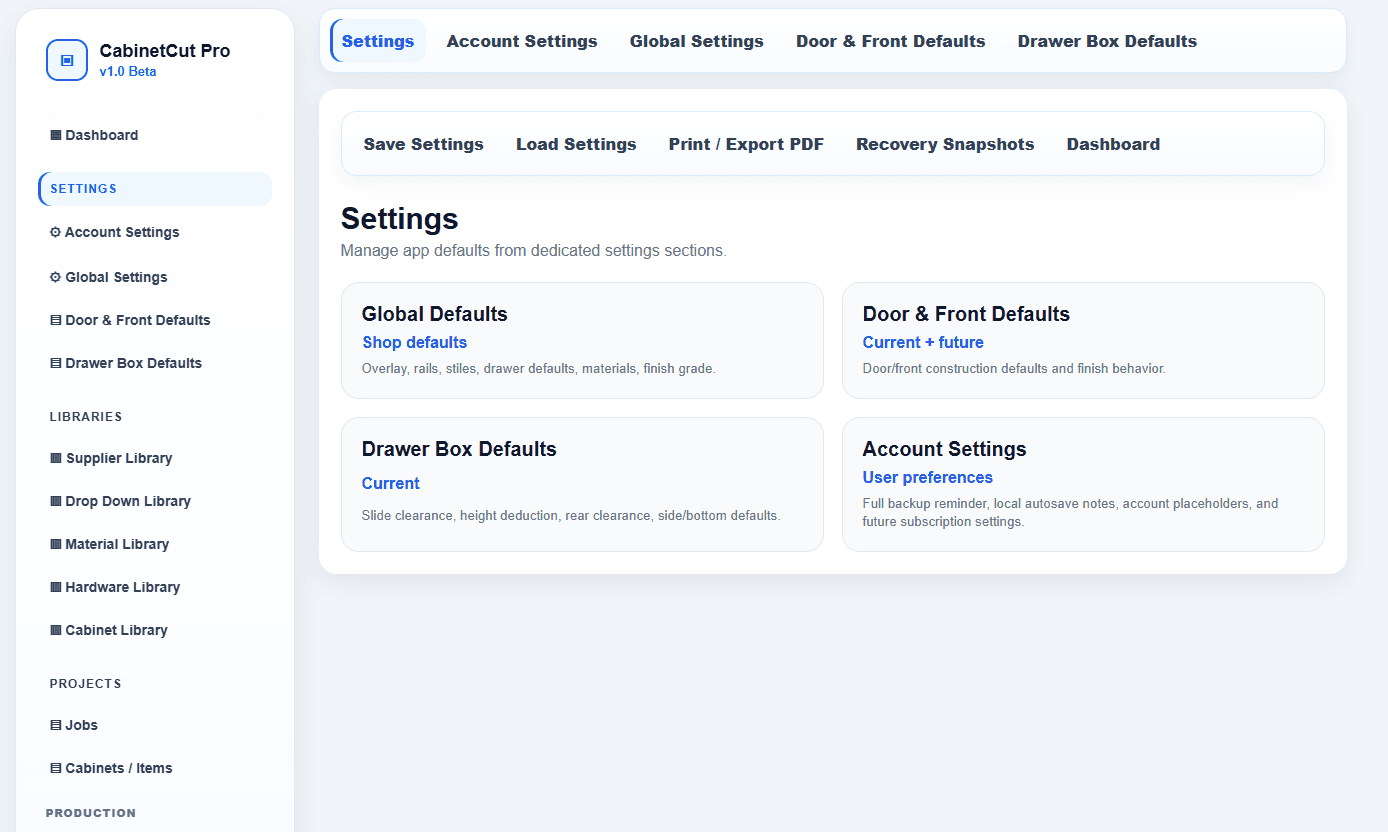
Example: Configure Your Shop Screen
Step 3 — Build Your Libraries
Create reusable material, hardware and cabinet libraries.
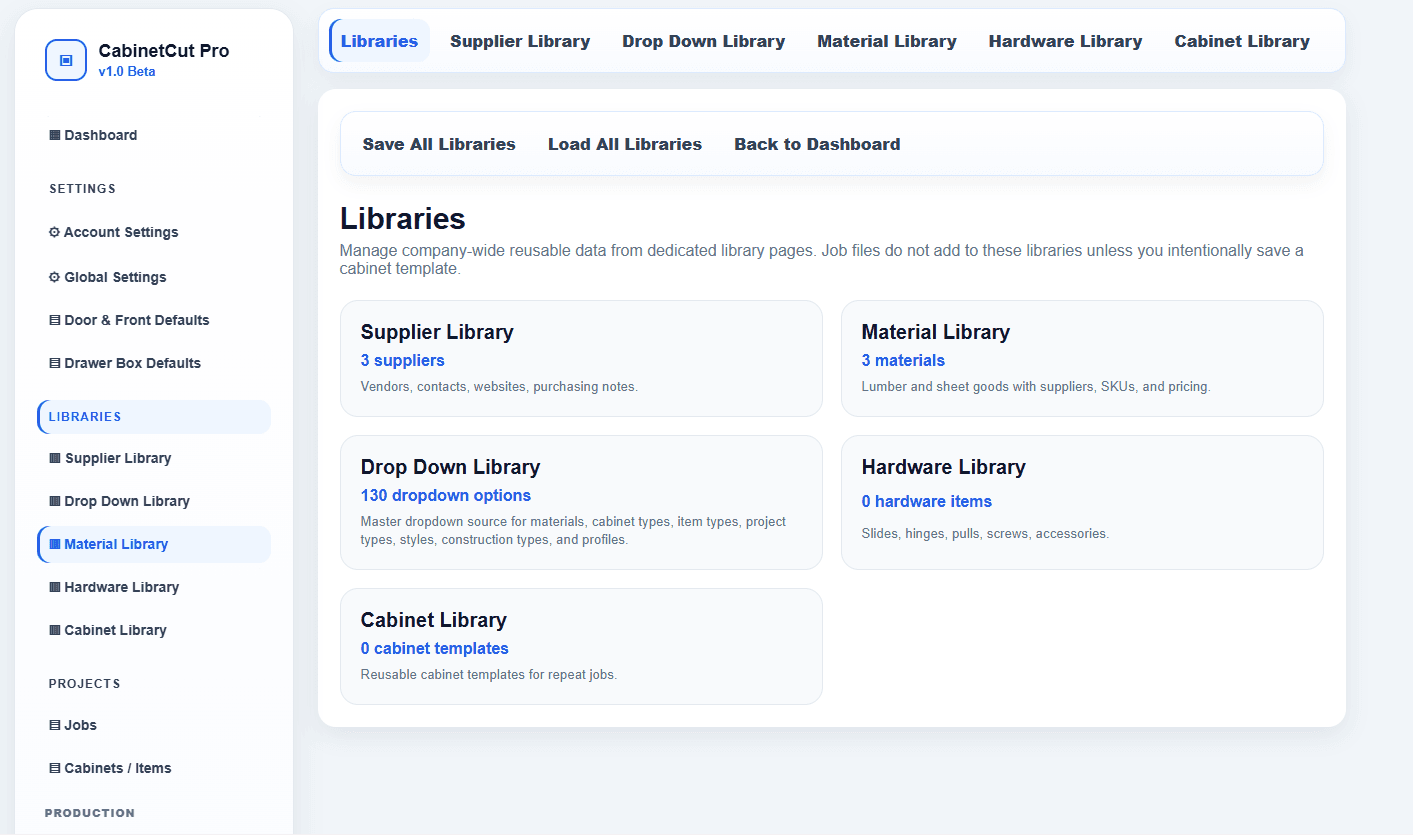
Example: Build Your Libraries Screen
Step 4 — Create a Job
Create customer/project information and notes.
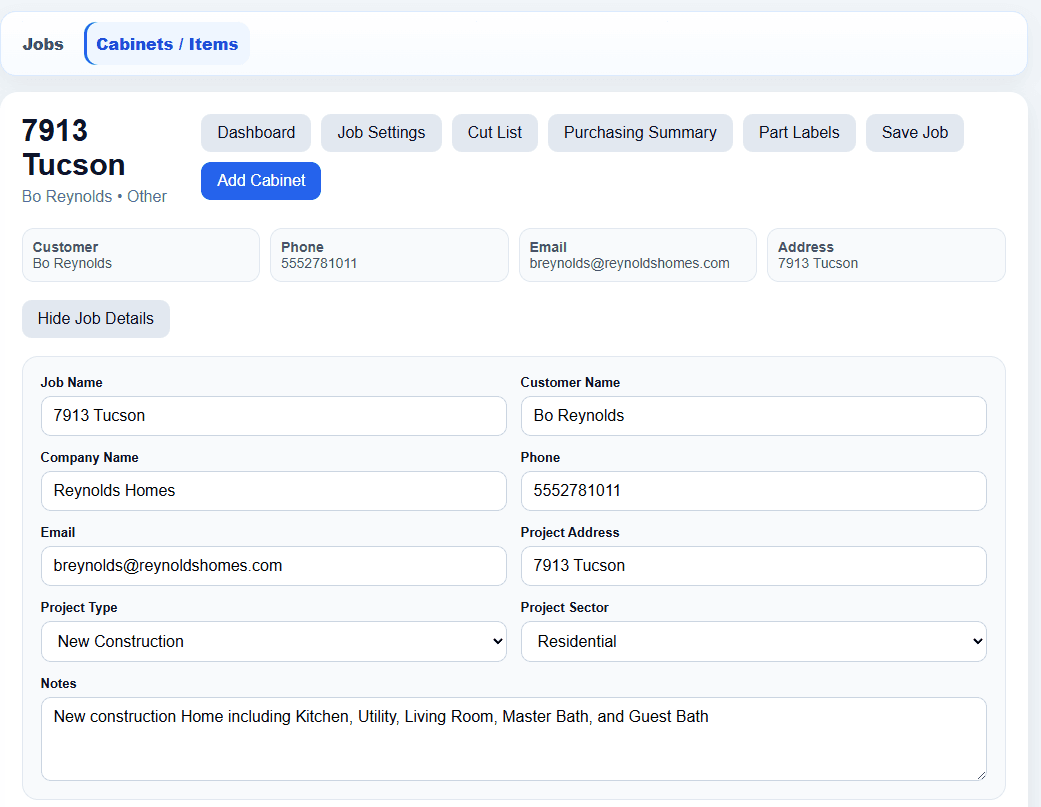
Example: Create a Job Screen
Step 5 — Add Cabinets
Create cabinets and enter cabinet dimensions.
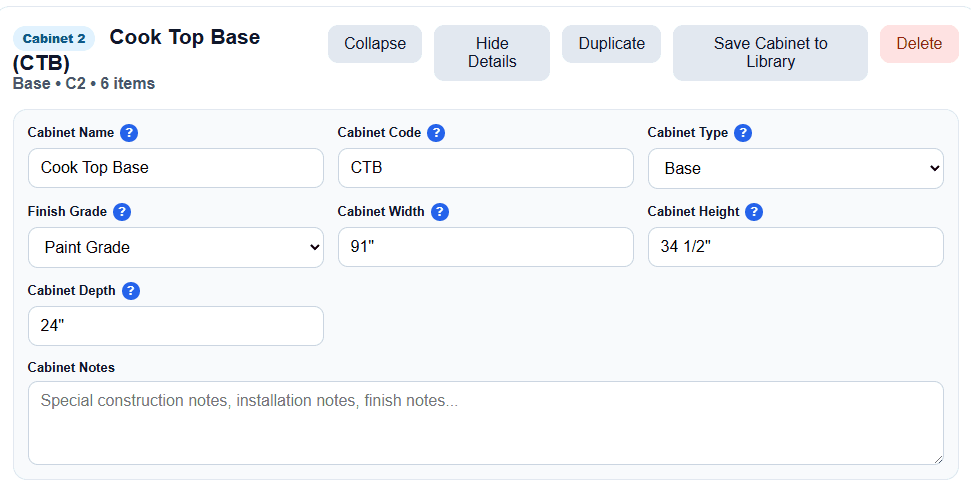
Example: Add Cabinets Screen
Step 6 — Configure Doors & Drawers
Automatically generate part calculations.
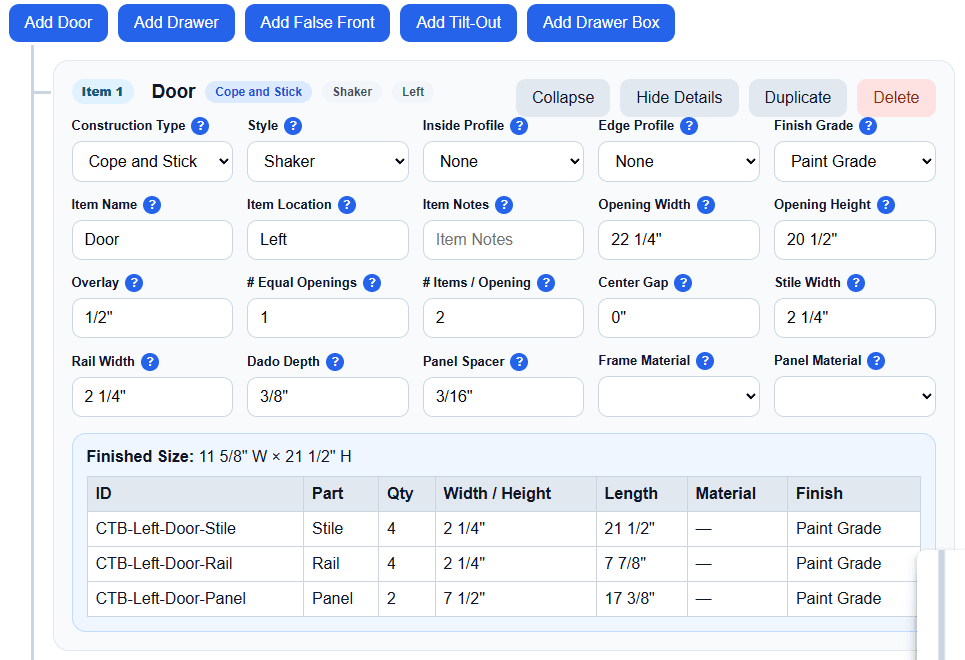
Example: Configure Doors & Drawers Screen
Step 7 — Generate Purchasing Summary
Generate material quantities and supplier purchasing information.
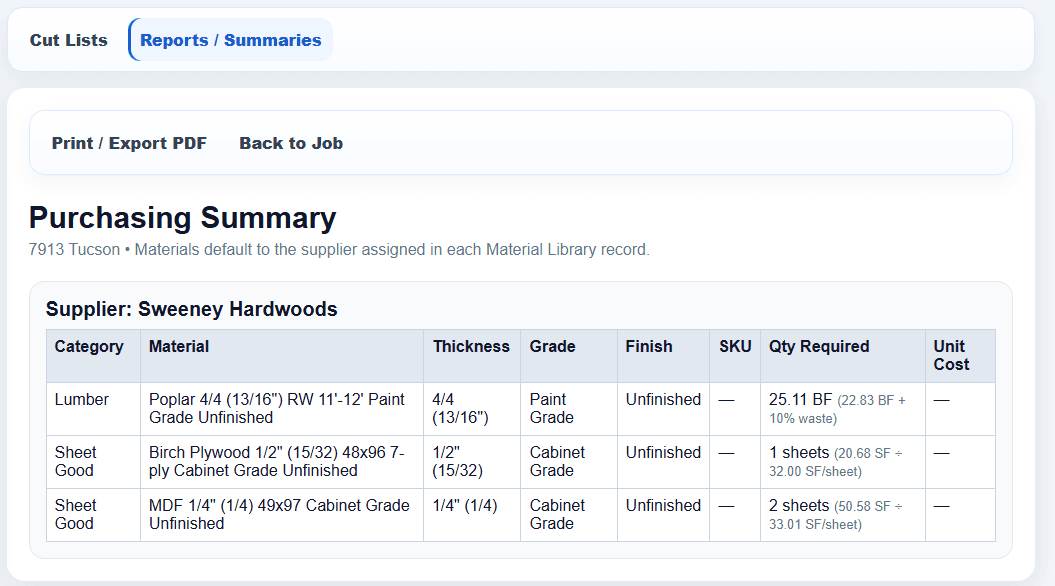
Example: Generate Purchasing Summary Screen
Step 8 — Generate Shop Output
Generate production cut lists.
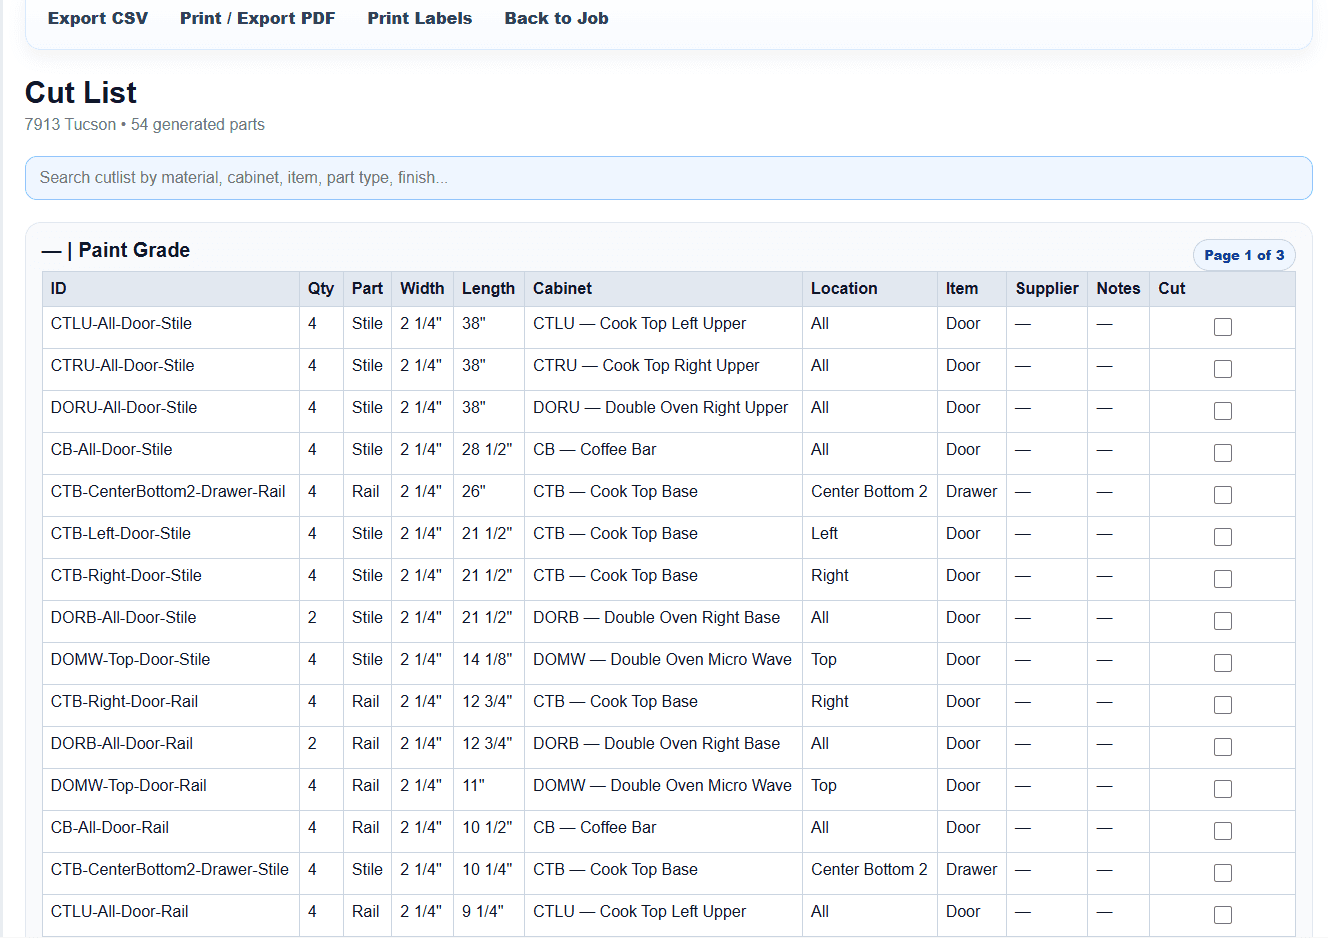
Example: Generate Shop Output Screen
Step 9 — Generate Labels
Generate printable part labels.
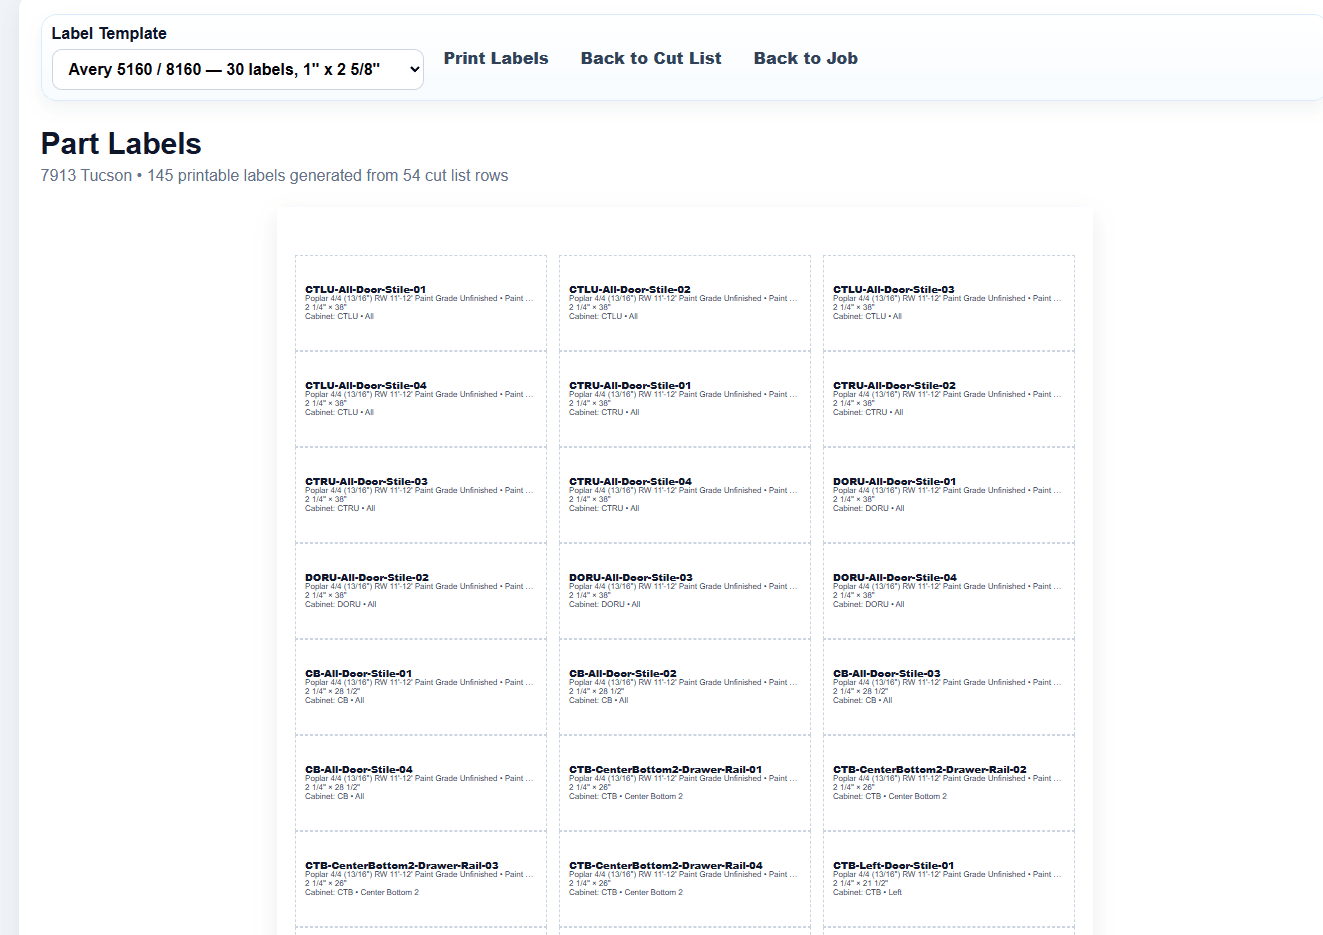
Example: Generate Labels Screen
Step 10 — Backup & Recovery
Create and restore project backups.
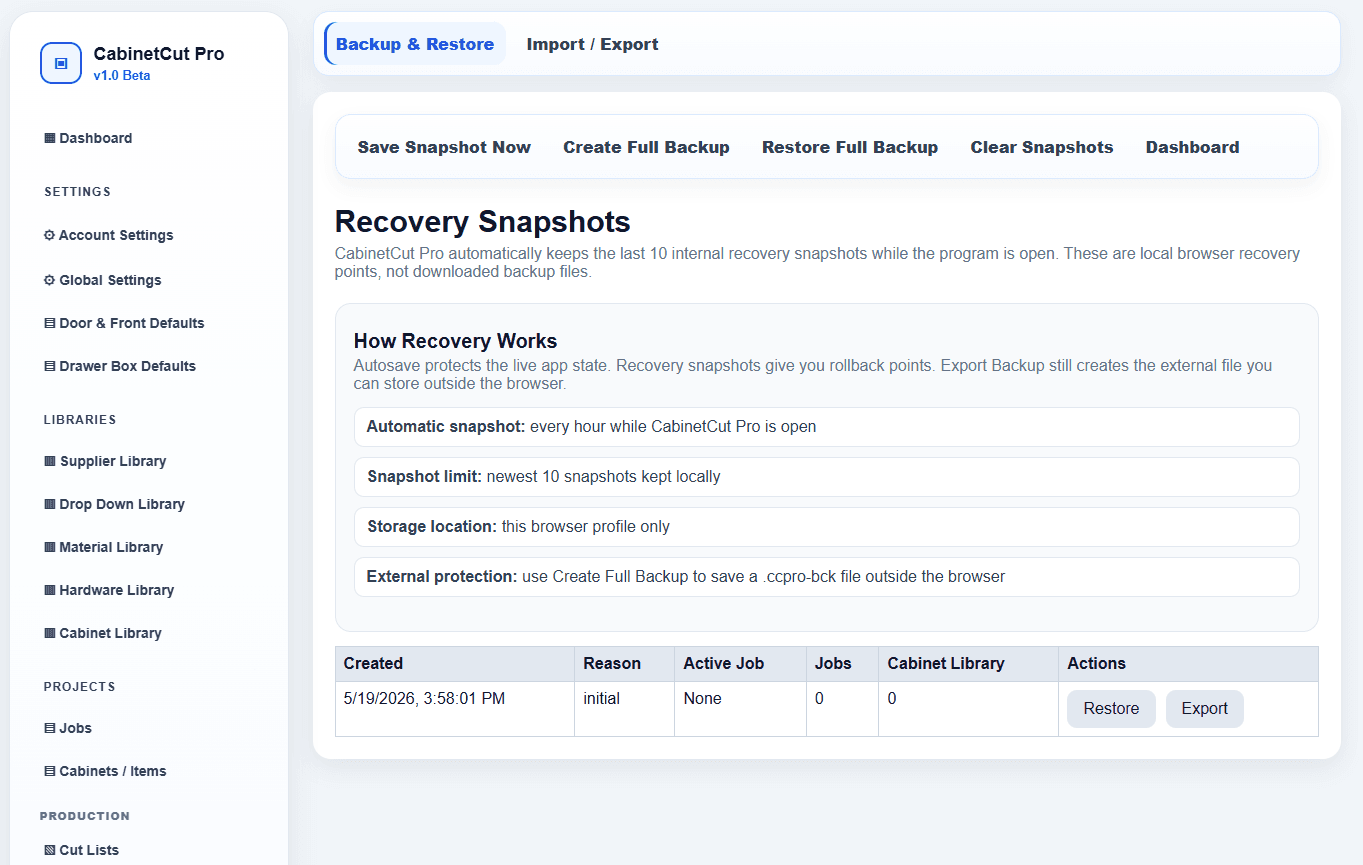
Example: Backup & Recovery Screen